Blueberry JamboreePrint Recipe


I have committed a cardinal sin in the world of blogging and that is to not update my page for ages – and I mean ages.

It is not like I have thrown my utensils in the air and left the confines of my kitchen, we have been on vacation, enjoying each others company and a glorious Summer – so cooking has not been at the forefront of my mind. We also had farmstand on almost every corner, bulging with Summers produce – cooking perfectly ripe tomatoes was not an option when we could eat them with a drizzle of olive oil and a sprinkle of sea salt. Simple salads that required nothing more than a chopping board and a knife, fresh fruit and loads of gelato were our typical holiday fare.

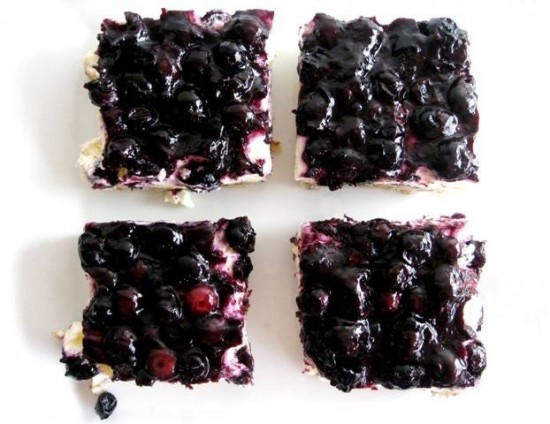
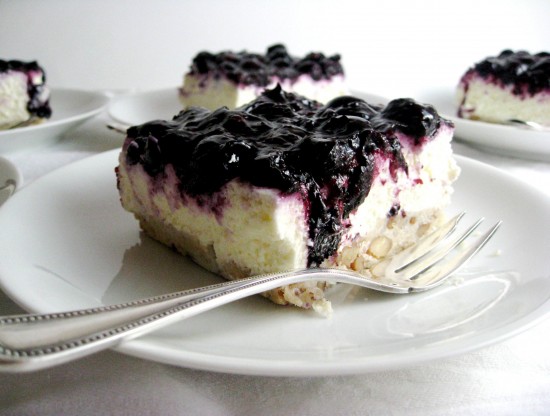
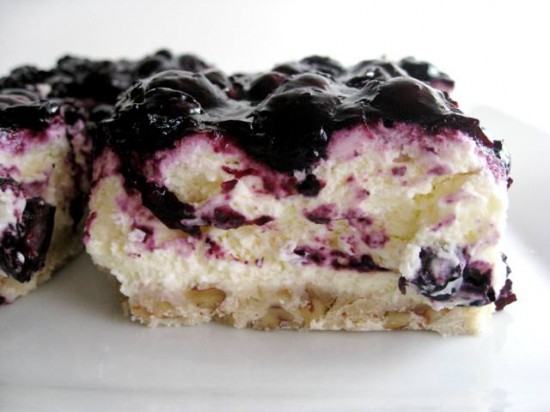
I whipped up this little number a couple of weeks ago when the sun was high in the sky and blueberries were bountiful, it is pretty much cheesecake bar and a very good one at that. The combination of cream cheese and whipped cream is just lush and creates the perfect filling for the compote-like blueberry topping. The base is your standard buttery shortbread biscuit with a peppering of toasted pecans – adding another element of perfection.

So long Summer, the chill in the air today was testament to Fall and along with the weather I am expecting to see a wonderful array of Autumnal produce very soon – apples and pumpkins immediately spring to mind….

I will be back soon – I promise!

Topping
3 1/2 cups fresh blueberries, divided
1/4 cup granulated sugar
1/8 cup brown sugar
4 1/2 teaspoons cornstarch, dissolved in 4 1/2 teaspoons water
3/4 tsp lemon zest

Base
3/4 cup unsalted butter, melted
2 cups all-purpose flour
1 cup toasted pecans, chopped
2 tablespoons confectioners (powdered/icing) sugar

Filling
2 cups heavy cream
16 ounces cream cheese, at room temperature
2 cups confectioners sugar

To make the blueberry topping, combine 1 1/2 cups blueberries in a large pot with the sugars. Cook over medium-high heat, stirring constantly, until sugar is dissolved, blueberries start to pop, and mixture comes to a boil. Add the cornstarch/water mixture and stir until blueberry mixture is slightly thickened. Remove from heat, stir in remaining 2 cups of blueberries and lemon zest. Cool to room temperature and refrigerate until ready to use (can be made a few days ahead of time).

To make the crust, preheat the oven to 325F. Butter a 9 x 13 inch baking dish. In a medium-sized bowl, combine the melted butter, flour, and pecans. Press mixture into the bottom of the prepared pan. Bake for 15 minutes, until it begins to brown lightly. Cool to room temperature.

To make the filling, whip the cream with an electric mixture until thick and creamy. Set aside. In a separate bowl, beat cream cheese and confectioners sugar until smooth. Fold whipped cream into the cream cheese mixture, just until combined.

Spread filling evenly over the crust. Top with blueberry mixture. Refrigerate  for one hour, or until set. Cut into slices and serve.

Source: adapted from Magnolia Bakery

Posted in Biscuits/Cookies/Slices/Bars, Desserts, Fruit, Morning Teas/High Teas | Leave a comment

Fruit TartPrint Recipe

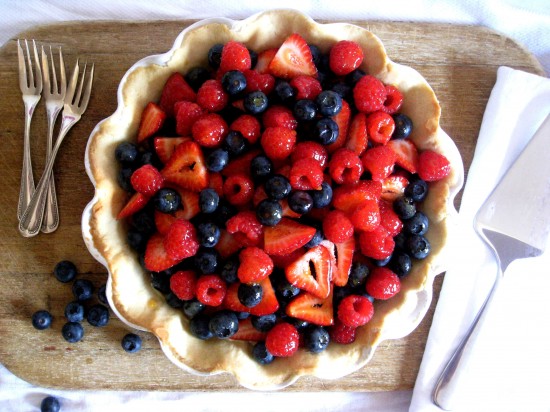
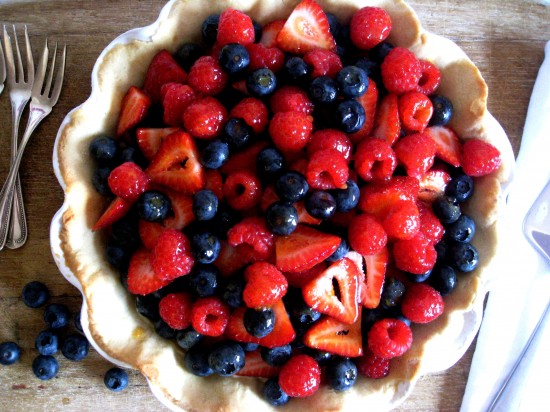
I think fruit tarts are mesmerising. They are the item that catches my eye at every bakery counter, the fruit so perfectly (or in my case, not perfectly) arranged, glistening in glaze and so full of gorgeous colour. They are a treat I would label as ‘splendid’ – I have no other world for them and no other word can really describe how visually appealing (and scrumptious) they are.

Having said all that, you think I might make them more often than I do – but pastry and I just don’t spend alot of time together, so it’s maybe only twice a year that I rustle one up, and it’s usually on a whim.

This whim occurred yesterday, when we felt that we had enough of the great outdoors and wanted some time to potter inside. My pastry recipe makes a little more than is required for a 9 or 10″ dish so my daughters were happy to make their own dough creations with the excess.

There is never a bad time to make (or eat) a fruit tart, and even if your appetite is not up for it, just enjoy looking at them – resplendid in all their fruity beauty.

Sweet Tart Dough
1 1/4 sticks (142 grams/5 ounces) unsalted butter (at room temperature)
3/4 cup (75 grams/2.6 ounces) confectioners’ sugar
1/4 cup lightly packed (50 grams /1.76 ounces) finely ground almond powder
1/4 teaspoon salt
1/4 teaspoon pure vanilla extract
1 large egg, lightly beaten, at room temperature
1 3/4 cups (245 grams /8.6 ounces) all-purpose flour, sifted

Pastry Cream
2 cups whole milk
1 vanilla bean, split lengthwise and scraped
6 large eggs yolks
1/2 cup sugar
1/3 cup cornstarch, sifted
3 1/2 tablespoons unsalted butter, at room temperature

Topping
3 – 4 cups of fruit, sliced or whole
Apricot or peach jam for glaze (optional)

Pastry
Place the butter in the bowl of a mixer with paddle attachment and beat until creamy, scraping down the edges as needed.

Add the sugar almond powder, salt, vanilla and eggs and still working on low speed, beat to blend the ingredients, scraping sides as needed. (dough may look curdled, that is okay)

With the machine on low, add the flour in three parts and mix until the dough mixture starts to get together. Do not over mix – stop when the dough comes together in a soft ball, just a matter of seconds.

Remove the sweet pastry dough and shape into a ball and flatten it slightly and then wrap in plastic wrap. If using the dough immediately, let it settle in the fridge for at least 2 hours or overnight. To freeze, put the wrapped disks in freezer bag and use within a month. (When starting from the frozen pastry disks, thaw about 45 minutes before the dough is ready for rolling out.)

To roll and bake the tart, butter a 9 or 10 inch tart pan.

Lightly flour a surface and a rolling pin, then roll out the pastry disk, working it in each direction to ease the shape into a circular shape between 1/16 and 1/8 inch thick. Carefully lay the rolled dough over the tart dish. With your fingers, gently ease the dough into the corners and up the sides. If the shell cracks, use scraps to patch.

Use the rolling pin or knife to cut off excess edges. Prick the surface all over with a fork. Line the shell with parchment or foil and fill with dried beans or rice.

Bake the crust at 350 degrees for 18-20 minutes until it is lightly colored. Remove the parchment or foil and beans and bake an additional 2-3 minutes to firm up the bottom.

Cool on a rack.

Pastry Cream
In a small saucepan, bring milk and vanilla bean (pulp and pod) to a boil over medium heat. Cover the pan and turn off heat and let rest to infuse vanilla for 10 minutes.

Fill a large bowl with ice cubes and water. Set aside smaller bowl that can hold the finished cream and be placed in the ice bath.

Whisk the yolks, sugar and cornstarch together in a heavy-bottomed medium saucepan. Remove vanilla bean pod from hot milk. Slowly drizzle some milk into yolks, whisking continuously. Still whisking, pour in all the liquid in a steady stream. Place the pan over medium heat and whisking vigorously without stopping, bring mixture to a boil. Keep at boil while whisking for 1-2 minutes. Remove from heat and scrape pastry cream into the small bowl in put it in the ice bath.

Stir the pastry cream continuously as it cools to keep it smooth. When it is about 140 degrees (very warm to the touch but not extremely hot) stir in butter in 3 or 4 additions. Return to ice bath and leave until cooled. Use immediately or cover with plastic wrap and store in the fridge for up to 2 days.

Glaze
Soften the jam over your stovetop and set aside to cool a little.

Assemble Tart
Pour the pastry cream into the cooked tart shell and top with sliced fruit of your choice. If you have decided to glaze the fruit, spoon or brush your glaze over the top.

Source: adapted from Pierre Hermes

Posted in Desserts, Fruit, Morning Teas/High Teas, Picnic Food, Tarts/Flans/Quiches/Pies | Leave a comment

Burrata With Shredded Sugar Snap Pea and Crispy Shiitake SaladPrint Recipe

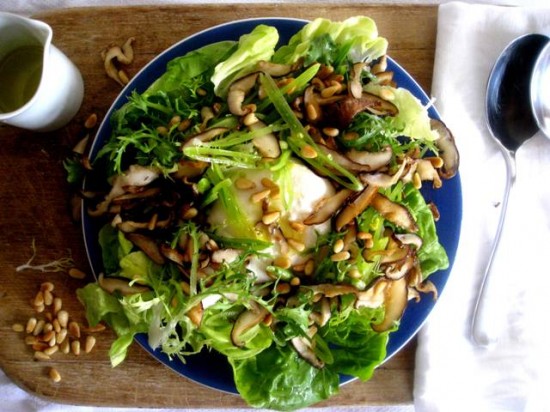
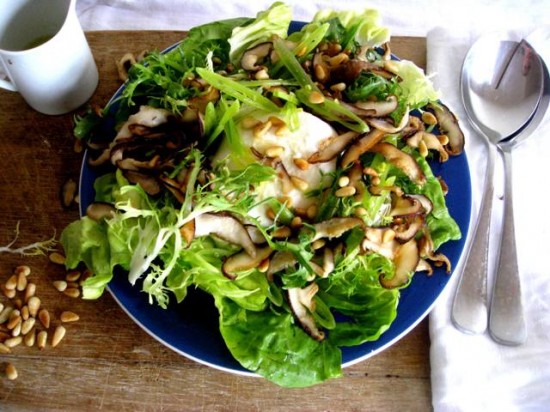
Here is another perfect salad for nibbling – whether it be lunch, dinner or a late supper. I can see myself crisping the Shiitake’s with a glass of champagne in hand – Mr Man and I may have just got home from a play, or a show on Broadway perhaps – and decided the night should not end so fast…

As with most salads I have made, each ingredient shines in it’s own way, but the true hero of this dish is the lemon infused olive oil – a perfectly simple dressing, which is so basic I just don’t know why I have not thought of it before.

Ingredients
1/4 cup extra virgin olive oil
1 lemon
Vegetable oil for pan-frying
5 fresh shiitake mushroom caps, sliced about 1/8-inch thick
Kosher salt
Leaves of frisée, radicchio or other salad greens
1 ball of burrata cheese, about 4 ounces, at room temperature (or use fresh mozzarella)
1/2 cup sugar snap peas, strings removed and thinly sliced lengthwise (to a slaw-like texture)
Maldon salt or other flaky finishing salt
2 teaspoons toasted pine nuts.

Put the olive oil in a small bowl. Using a microplane, zest the lemon directly over the olive oil so that the zest falls in and the essential oils are captured. If possible, do this an hour before serving. You’ll end up with more flavored oil than you need; you can refrigerate it and use for a salad dressing in the next few days. Juice the lemon and reserve the juice separately.

Line a plate with paper towels. Put your largest skillet over medium-high heat and add enough vegetable oil to generously coat the bottom. When the oil is shimmering, add the mushrooms in a single layer. Sprinkle with a pinch of kosher salt. Cook until deep golden brown on one side, then flip and cook the other side. Transfer with a slotted spatula to paper towels and allow to cool.

Strain the lemon zest from the olive oil. Put a few leaves of frisee or radicchio on your serving plate and place the burrata on top. In a small bowl, toss the sugar snap peas with a generous tablespoon of the olive oil, 2 teaspoons of the lemon juice and 1/4 teaspoon of the Maldon salt. Pour the contents of the bowl over the burrata. Scatter the shiitakes over the top, then the pine nuts and a few more flakes of Maldon salt. Serve right away, before the mushrooms lose their crunch.

Yeild: 2 as an appetiser

Source: New York Times

Posted in Lemons, Recipes, Salads, Sides, Starters, Vegetables, Vegetarian | Leave a comment

Cherry ClafoutisPrint Recipe

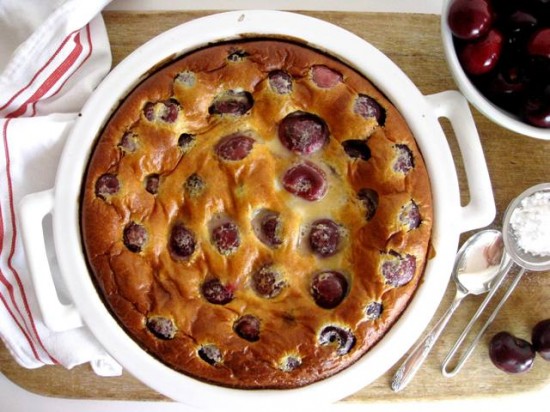
 It’s cherry time again and every day we are scrubbing deep, red stains off our fingers (the table and even the walls and doors) – they are plump and juicy and so full of flavour.

This particular dish seemed to be featured on amost every food blog I looked at last year – it reminded me a little of something my grandmother used to make so I made a mental note to try it out next time cherries came back in season.

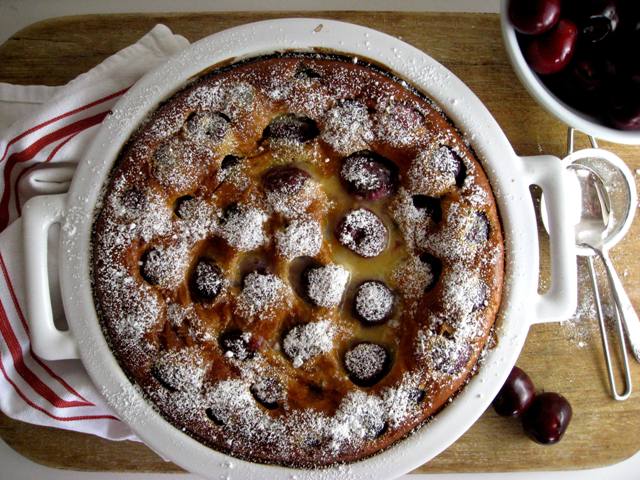
The quintessential French dessert, with cherries sitting pretty in a pancake-like batter. It is not overly sweet so the light dusting of powdered sugar gives it that little extra something. We had ours straight from the oven, which was around brunch time – perfect!

Ingredients
1 tablespoon butter
1 tablespoon vanilla extract
6 eggs
8 tablespoons sugar
1 1⁄4 cups milk
2 tablespoons kirsch
Pinch salt
3⁄4 cup flour
3 cups black cherries, pitted or unpitted (unpitted enhances the cherry flavour)
Icing sugar (confectioners’/powdered sugar)

Preheat oven to 425°. Generously butter a 9″ cast-iron skillet or baking dish. Combine vanilla extract, eggs, sugar, milk, kirsch, and salt in a blender. Blend for a few seconds to mix ingredients, then add flour and blend until smooth, about 1 minute.

Pour batter into your buttered dish/skillet, then distribute cherries evenly over top. Bake until a skewer inserted into batter comes out clean and a golden brown crust has formed on top and bottom of clafoutis, about 30 minutes. Remove from the oven, dust lightly with icing sugar and serve warm or at room temperature.

Notes: If you do not have any kirch on hand, an amaretto or even some dark rum would be a nice substitute. You could aso add a little sprinkling of lemon zest (or limoncello) should you prefer a lemon flavour.

Posted in Breakfast, Cakes, Desserts, Fruit, Picnic Food | Leave a comment

Chocolate Molten CakesPrint Recipe

Over the last couple of weeks I have recieved daily emails from Mr Man marked ‘urgent’, they have had recipes attached – all of them involving chocolate to various degrees. So it got me wondering if he was feeling a little starved of his most favourite ingredient.

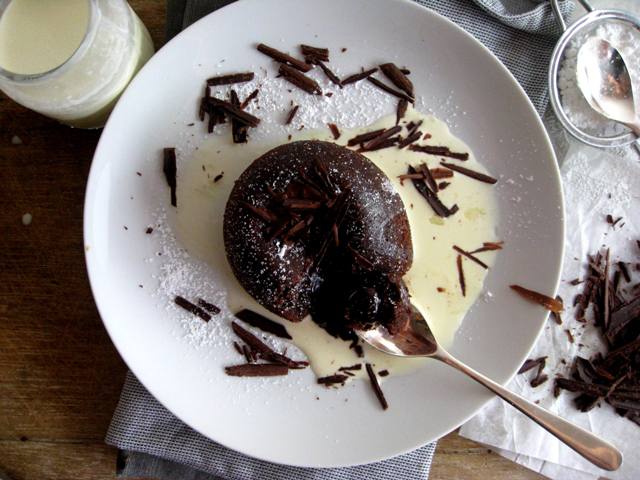
This particular recipe came from the Sydney Morning Herald (in Australia) and no matter that it is Winter over there and New York is in the middle of a heat wave – I decided that served with a nice vanilla bean ice cream, these delectable beauties would go down very nicely.

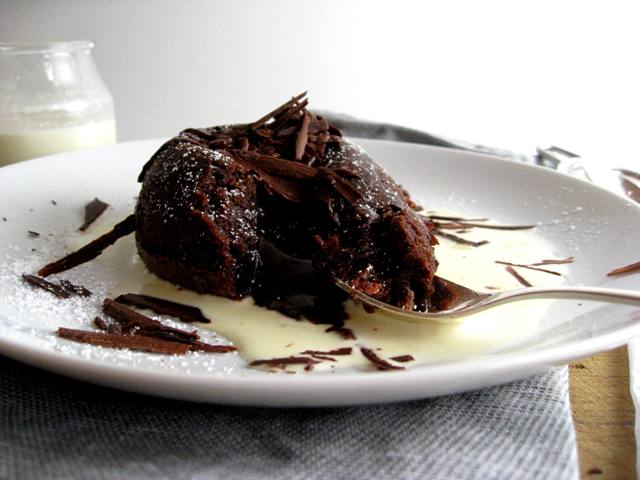
And  they are everything you can imagine chocolate molten puddings should be – cakey exteriors with luscious, molten chocolate centres.

Now, remember that these must be served as soon as they are removed from the oven – which won’t be hard I assure you!

Ingredients
125 grams butter, plus 2 tsp extra
200 grams good quality bittersweet dark chocolate, chopped
2 large eggs, plus 2 egg yolks
125 grams sugar
1 teaspoon vanilla extract
35 grams plain (all purpose) flour, sifted
100ml cream

Heat oven to 170c/338f. Use extra butter to grease four 150-millilitre heatproof souffle moulds or ramekins, and place on a baking tray. Melt remaining butter and 150 grams of chocolate in a heatproof bowl set over a pot of gently simmering water. Remove from heat and whisk until smooth.

Using an electric beater, beat eggs, yolks, sugar and vanilla for two minutes until pale and creamy. Fold in chocolate mixture, then sift flour over the top and fold through.

Fill the 4 ramekins or moulds evenly with the mixture and place on a rack in the oven – close to the bottom of the oven.

Bake for 13-14 minutes (my baking time was 18 minutes) until puffed and set on top but still soft in the centre. Invert each mould on to a warm dessert plate, drizzle with cream and scatter with remaining chocolate.

Notes: New York chef Jean-Georges Vongerichten says the best way to serve them is to invert each mould on to a plate, and let sit for about 10 seconds. ”Then unmould by lifting up one corner of the mould,” he says.

Source: Jill Dupleix

Posted in Chocolate, Desserts | Leave a comment

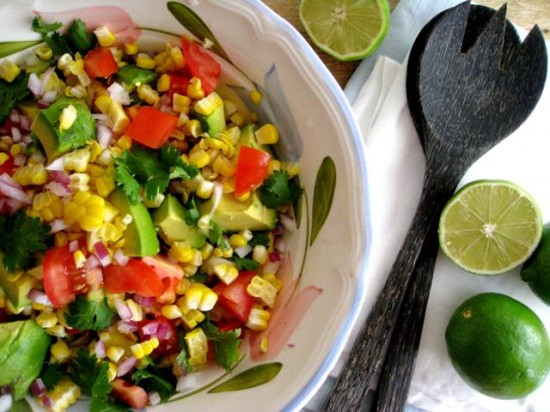
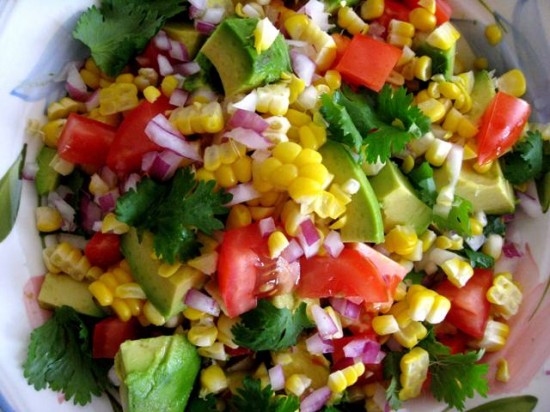
Summer Salad (Sweet Corn, Tomato & Avocado with Cilantro)Print Recipe


I love the 4th of July holiday – it seems to be the most comparible national holiday to Australia Day, with every one heading to the beach to celebrate or lighting up a grill in their backyard. In the past we have spent this day either alone or amongst a group of people we barely know. This year we were fortuotus enough to spend the day with some dear friends in Sag Harbour. There was lots of swimming, good food, good wine and very active children – who even got us doing cartwheels (not an easy thing after a few glasses of wine and a tummy full of food).

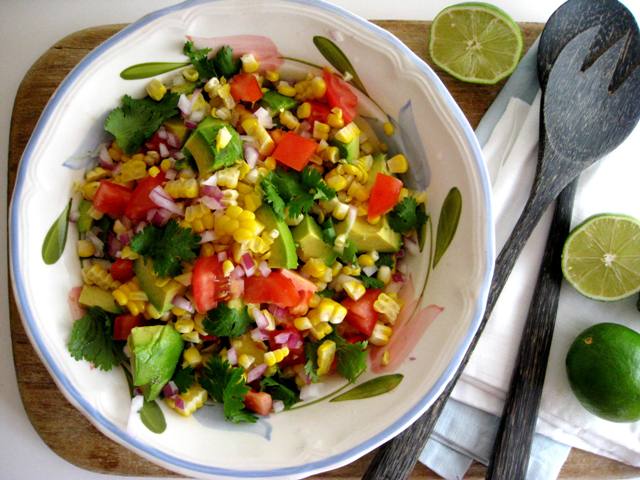
Our hosts, the Klabin family, profess they do not know much about cooking but magically provided everyone with a great BBQ selection and this most amazing salad. In true Summer style, the flavours were simple, fresh and totally delicious. It was great with the grilled meat, chicken and fish they served and I can imagine it would also be a super side to fish taco’s or something a little Mexican in nature.

And of course, perfectly ripe tomatoes, corn and avocado are mandatory!!

Ingredients
4 sweet corn (or around 2 cups), cooked and sliced from the husk
2 avocado, diced into 1/2″ cubes
2 perfectly ripe large tomatoes, diced
1/2 spanish onion (or 1/2 cup), finely diced
1/3 cup cilantro

Dressing
2 tablespoons of olive oil
juice from 1 – 2 limes (or 1 tablespoon)
sea salt and pepper, to taste

Whisk the oil with the lime juice, salt and pepper – set aside.

Combine the corn, avocado, tomatoes, onion and most of the cilantro in a large glass bowl. Drizzle with the dressing, scatter with remaining cilantro and serve.

Notes: You can substitute the tomatoes for 2 cups of halved cherry tomatoes. Also, if you are on a health kick you can skip the oil and just dress the salad lime juice – it is just as nice.

Source: Kristen & Alex Klabin

Posted in Picnic Food, Salads, Sides, Vegetables, Vegetarian | Leave a comment

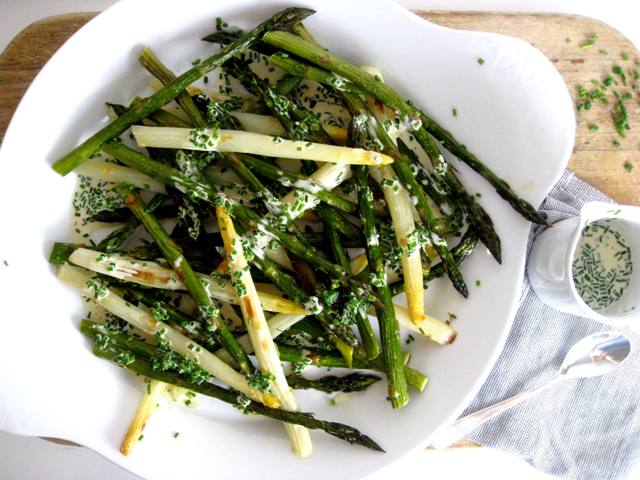
Roast Asparagus Salad with Sour Cream and Chive DressingPrint Recipe

 Here is something that might tickle your fancy – being that asparagus is only in season for a few more weeks. It is the epitome of a good salad; simple, fast and fresh with a killer dressing.

Consider a blend of white and green asparagus, roasted and served with a drizzle of dressing that would not be out of place on a variety roast vegetables – especially potatoes.

Cooking with white asparagus always amuses me, and today my daughter Lucy made a very funny comment about her asparagus (which I won’t repeat in the event that I offend), needless to say, I am still giggling and feel that my amusement at the white asparagus is justified.

So back to the salad – try it out, it’s delicious!

Ingredients
200 mls chicken stock
50 grams/1.76 ounces butter, coarsely chopped
3 bunches each white and green asparagus, peeled and trimmed
100 mls extra-virgin olive oil
Sour cream and chive dressing
3 teaspoons lemon juice
3 teaspoons rice wine vinegar
½ egg, lightly whisked
¼ teaspoon oyster sauce (optional)
¼ cup grapeseed oil
1½ tablespoons extra-virgin olive oil
¼ cup sour cream
½ cup finely chopped chives

To make sour cream and chive dressing, blend lemon juice, vinegar, egg and oyster sauce in a blender to combine, then with motor running, gradually add oils in a thin steady stream until incorporated, add sour cream, blend to combine, season to taste and stir through chives. Refrigerate until required.

Heat chicken stock and butter in a deep frying pan over low heat, add white asparagus and cook until stems are just tender but not overcooked (5-6 minutes). Drain, then refrigerate until chilled (20-30 minutes).

Preheat oven to 230c/460f fan-forced. Combine green and white asparagus and extra-virgin olive oil in a bowl, season to taste, pour onto an oven tray, spreading asparagus in a single layer, and roast, turning occasionally, until tender (12-15 minutes). Transfer to a serving platter, drizzle with sour cream and chive dressing and serve warm.

Source: Deitmar Sawyere

Wine Pairing: Chardonnay

Posted in Salads, Sides, Starters, Vegetables, Vegetarian | Leave a comment

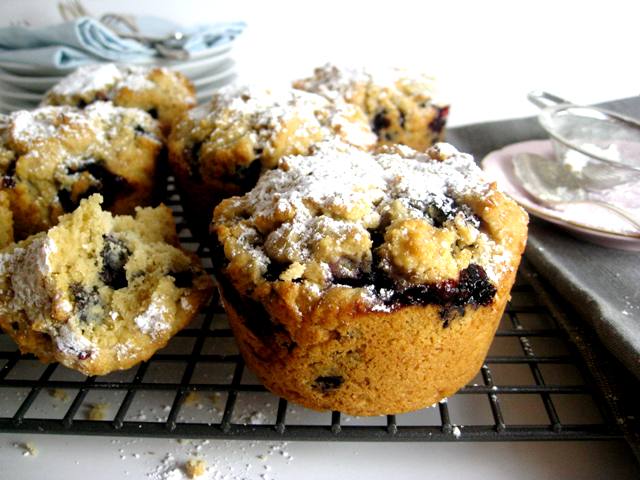
Flinders Mixed Berry MuffinsPrint Recipe

About a year and a half ago, on a rainy day in Flinders (Victoria, Australia), I found myself taking shelter in a local coffee shop. It was on this day I ate the best mixed berry muffins I have ever tasted – full of plump berries, a decent crumb (not sponge-like) and perfectly sweet – so you could have enjoyed them with a nice homemade jam should you desire.

On my way out the door I asked for the recipe, not thinking they would give it to me – but they did, and here it is. Can I just tell you – I love people who share their recipes!

Ingredients
1/2 cup of packed brown sugar
3/4 cup of almond meal
1 3/4 cups self raising flour
A pinch of salt
1 cup of cream
2 eggs
83 grams melted butter
200 grams mixed berries

Heat the oven to 180c/360f with the oven rack sitting in the middle position. Grease a standard 12 cup muffin tin (or the equivalent) and set aside.

Melt the butter and set aside to cool. Whisk the flour, almond flour and salt in a bowl until combined.

In another bowl whisk the eggs until well combined and lightly coloured – around 30 seconds. Add the brown sugar and whisk vigorously until thick and blended – around 30 seconds. Add the melted butter and whisk to combine. Follow with the cream – whisking again just to combine.

Add the berries to the dry mixture and stir till evenly dispersed. Add this to the cream mixture and fold with a rubber spatula and the batter comes together. Do not overmix.

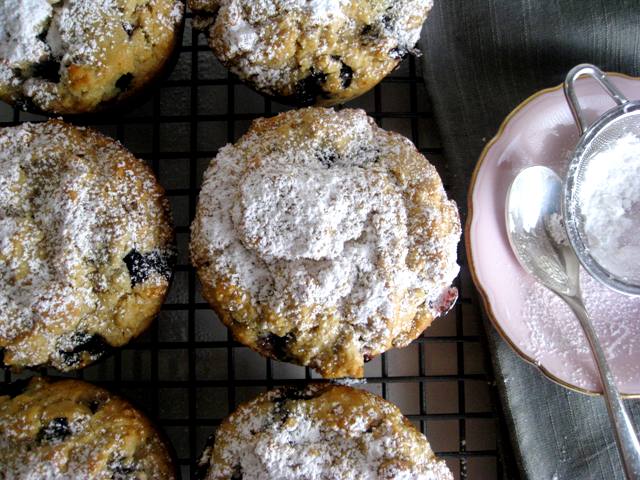
Spoon the mixture in your tin evenly and bake for 20 – 25 minutes or until a skewer comes out crumb free. Sprinkle with icing (confectioners) sugar and serve warm or cool in the pan.

Yield: 12 standard muffins or 6 larger muffins (larger will require 30 minutes in the oven)

Source: a coffee shop in Flinders

Posted in Breakfast, Cakes, Morning Teas/High Teas, Picnic Food | 2 Comments

Milk Bar Pistachio Layer CakePrint Recipe

I have been avoiding this cake for a couple of weeks. In fact I purchased the two key ingredients (pistachio paste and pistachio oil) over two months ago and have just been waiting for the inclanation to come – which it did this week. And after a day or two of making and baking, and a further twelve hours of freezing, we finally got to try this incredible concoction.
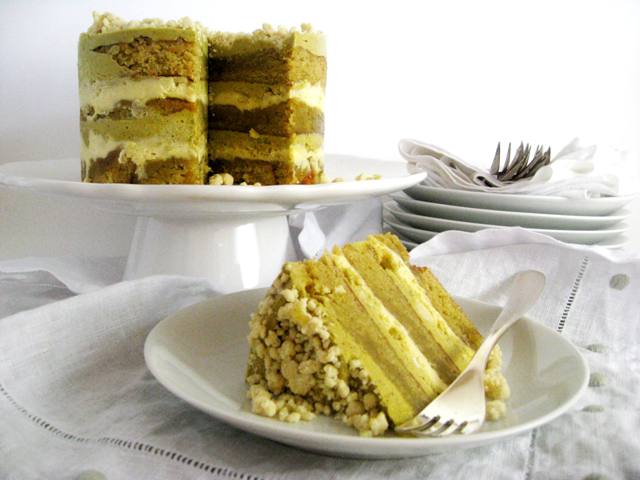
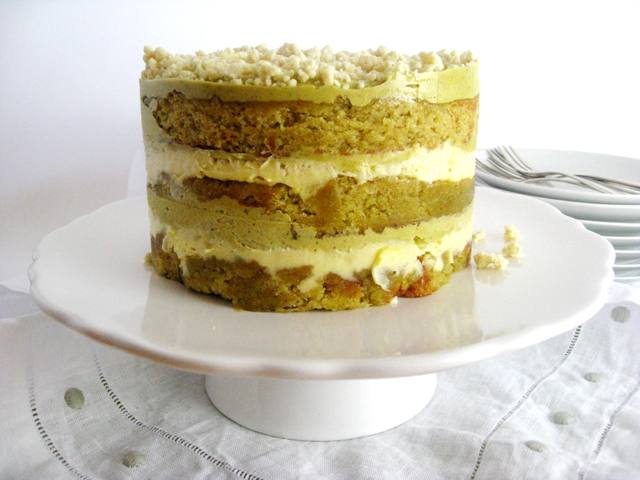
This recipe screams ‘Christina Tozi’, it’s creator and the creator of many treats involving unusual (yet strangely obvious) flavour combinations and recipes within recipes. As the title correctly says – this is a pistachio cake, but by all accounts the real hero in this recipe is the lemon curd which, sandwiched between the dense pistachio cake, the milk crumbs and buttery pistachio frosting, provides a much needed distraction from the dominance of pistachio flavour.
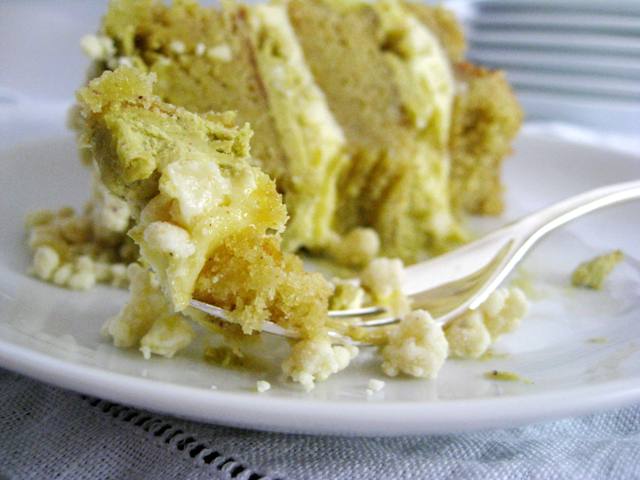
This cake reminded me of some dainty morsel I would purchase in a quintessential Parisian patisserie – rich and decadent, just on a larger scale. Make sure you have people to eat it with!

Ingredients
Pistachio Cake (recipe below)
65 grams Pistachio Oil
Lemon Curd (recipe below)
Milk Crumbs (1/2 the quantity from recipe below)
Pistachio Frosting (recipe below)

*You will also need 1 (6 inch) cake ring and 2 strips acetate, each 3 inches wide and 20 inches long.*

Put a piece of parchment on the counter. Invert the cake onto it and peel off the parchment from the bottom of the cake. Use the cake ring to stamp out 2 circles from the cake, these are your top 2 cake layers. The remaining cake ‘scraps’ will come together to make the bottom layer of the cake.

For the first layer, clean the cake ring and place it in the center of the baking sheet lined with clean parchment. Use 1 strip of acetate to line the inside of the cake ring. Put the cake scraps inside the ring and use the back of your hand to press the scraps together into a flat even layer. Dunk a pastry brush in the pistachio oil and give the layer of cake a good healthy bath of half of the oil. Use the back of the spoon to spread half of the lemon curd in an even layer over the cake. Sprinkle one-third of the milk crumbs evenly over the lemon curd and use the back of a spoon to spread one third of the pistachio frosting as evenly as possible.

For layer two, gently tuck the second strip of acetate between the cake ring and the top 1/4 inch of the first strip of acetate, so that you have a clear ring of acetate 5 to 6 inches tall – high enough to support the height of the finished cake. Set a cake round on top of the frosting, and repeat the process for layer one.

For layer three, nestle the remaining cake round into the frosting. Cover the top of the cake with the remaining frosting. Give it volume and swirls, or you can opt for a perfectly flat top. Garnish the frosting with the remaining milk crumbs.

Transfer the baking sheet to the freezer and freeze for a minimum of 12 hours to set the cake and filling. The cake will keep in the freezer for up to 2 weeks.

At least 3 hours before you are ready to serve the cake, pull the sheet pan out of the freezer and, using your fingers and thumbs, pop the cake out of the cake ring. Gently peel off the acetate, and transfer the cake to a platter or cake stand. Let it defrost in the fridge for a minimum of 3 hours (wrapped well in plastic, the cake cake be refrigerated for up to 5 days). Spend some time gazing at your hard work, then slice and serve.
 
Pistachio Cake
90 grams pistachio paste
75 grams glucose (or corn syrup)
6 egg whites
280 grams icing (powdered/confectioners) sugar
110 grams almond meal/flour
75 grams pistachio oil (or you can use grapeseed as a substitute)
55 grams heavy cream
160 grams plain (all purpose) flour
1 teaspoon baking powder
1/2 teaspoon kosher salt

Heat the oven to 175 c. Combine the pistachio paste and glucose in the bowl of a stand mixer fitted with a paddle attachment and beat on medium low for 2 to 3 minutes, until the mixture turns into a sticky green paste. Scrape down the sides of the bowl with a spatula.

On low speed, add the egg whites one at a time, being careful not to add the next egg white until the previous one is completely incorporated. Stop the mixer and scrape down the sides of the bowl with a spatula after every 2 to 3 egg whites.

Add the icing/confectioners’ sugar and almond meal and, on low speed, paddle them in for 2 to 3 minutes, until the mixture thickens. Stop the mixer and scrape down the sides of the bowl. Stream in the pistachio oil and heavy cream and paddle on low speed for 1 minute. Stop the mixer and scrape down the sides of the bowl.

Add the flour, baking powder, and salt and paddle on low for 2 to 3 minutes, until the batter is super smooth.

Spray a 9 x 13 cake pan and line it with parchment paper. Using a spatula, spread the cake batter in an even layer in the pan. Bake for 20 to 22 minutes. At 20 minutes, gently poke the edge of the cake with your finger; the cake should bounce back and it should be slightly golden brown on the sides and pulling away from the sides of the pan slightly.

Take the cake out of the oven and cool on a wire rack and use straight away or place in your fridge, wrapped in plastic, for up to 5 days.

Lemon Curd
3 lemons
100 grams sugar
4 egg yolks
1 gelatin sheet
115 grams butter, very cold
a pinch of salt

Zest the lemons. Put the sugar, lemon zest and 80 grams of lemon juice in a blender and blend until the sugar granules have dissolved. Add the egg yolks and blend on low until you have a bright yellow mixture. Transfer the contents to a medium pot or sauce pan.

Bloom the gelatin by placing this sheet in a bowl with cold water for a few minutes to soften.

Heat the lemon mixture over low heat, whisking regularly. As it heats up, it will begin to thicken; keep a close eye on it. Once it boils, remove it from the stove and transfer it to the blender. Add the bloomed gelatin, butter, and salt and blend until the mixture is thick, shiny and super smooth.

Pour the mixture through a fine mesh sieve into a heat proof container and put in the fridge until the lemon curd has cooled completely, at least 30 minutes. This can be refrigerated for up to 1 week.

Pistachio Frosting
115 grams butter, at room temperature
40 grams icing (powdered/confectioners’) sugar
230 grams pistachio paste
a pinch of salt

Combine the butter and sugar in the bowl of a stand mixer fitted with a paddle attachment and cream together on medium high for 2 to 3 minutes, until fluffy and pale yellow.

Add the pistachio paste and salt and mix on low speed for half a minute, then kick up the speed to medium high for 2 minutes. Scrape down the sides of the bowl.

Use the frosting immediately, or store it in an airtight container for up to one week.

Milk Crumbs
1/4 cup plus 1 tablespoon nonfat milk powder
2 tablespoons all-purpose flour
1 tablespoon cornstarch
1 1/2 teaspoons sugar
1/8 teaspoon salt
1 1/2 tablespoons unsalted butter, melted
1/4 cup white chocolate, melted

Preheat oven to 225 degrees. Line a baking sheet with parchment paper; set aside.

In a medium bowl, whisk together 2 tablespoons plus 1 1/2 teaspoons milk powder, flour, cornstarch, sugar, and salt. Stir in melted butter until well combined. Spread mixture on prepared baking sheet and transfer to oven. Bake until dried and crumbly, 8 to 10 minutes. Remove milk crumble from oven and let cool completely.

Transfer milk crumble to a large bowl and fold in remaining 2 tablespoons plus 1 1/2 teaspoons milk powder and white chocolate. Use immediately or transfer to an airtight container and keep refrigerated until ready to use.

Yield: Makes 1 (6-inch) Layer Cake, 5 to 6 inches tall; Serves 6 to 8

Notes: Pistachio Paste and Pistachio Oil are available on Amazon.

Source: Christina Tozi, Momufuku Milk Bar

Posted in Cakes, Desserts, Lemons, Morning Teas/High Teas | Leave a comment

French Onion SoupPrint Recipe

It’s raining cats and dogs here in New York City and all I can think about is French Onion Soup. For no reason. other than I think it is the perfect thing to have on such a ‘stay inside and get cozy’ kind of day.

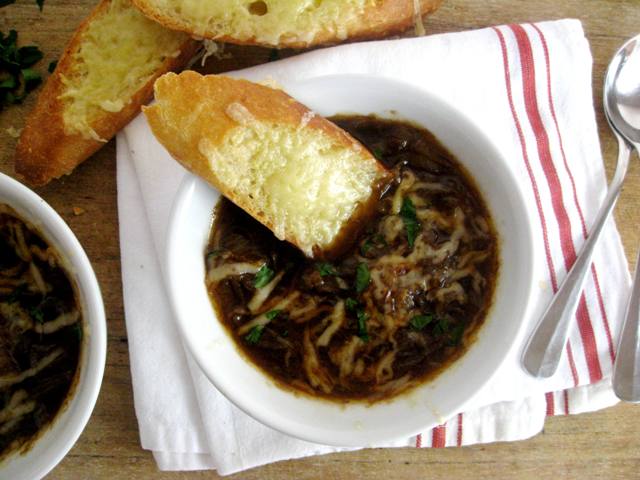
As much as this soup was a necessity and staple in days gone by (because onions were plentiful and easy to grow), I would now call it a luxury – a little bit of heaven for your taste buds, made even more heavenly with the addition of some bread and cheese. A sumptuous broth with a deep caramelized onion flavour, topped with a grilled gruyere crouton – so simple, so rustic and so darn good.

I don’t know what you have planned for today but I am going to ‘soup and nap’ it – or maybe just listen to the rain…

Ingredients
100 grams/3.5 ounces butter, coarsely chopped
2 kilos/4.4 pounds onions, thinly sliced
1 litre (4 cups) beef stock
4 thyme sprigs
3 parsley stalks
1 fresh bay leaf
8 1cm-thick slices of baguette cut on diagonal, lightly toasted
250 grams/8.8 ounces coarsely grated Gruyère
 
Melt butter in a large, wide heavy-based saucepan over medium heat, add onions, cover and cook, stirring occasionally, for 20 minutes or until onions are soft. Remove lid and cook for 1 hour or until soft and starting to caramelise. Add stock, ½ a cup at a time, and simmer for 5 minutes or until stock has almost evaporated. Repeat three times more until 2 cups of stock has been added. Using kitchen twine, tie herbs together, add to onions with remaining stock and season to taste with sea salt and freshly ground black pepper. Bring to the boil, reduce heat and simmer, scraping the base to remove any caramelised bits, for 40 minutes or until thick. Makes 6 cups.

Preheat oven to 200c/400f. Ladle soup into 1½ capacity oven-proof bowls and transfer to an oven tray. Scatter with half the cheese, top each with two toasted baguette slices and scatter with remaining cheese. Place in oven and cook for 5 minutes or until cheese melts. Serve immediately.

Posted in Mains, Soups, Starters, Vegetables, Vegetarian | Leave a comment